Monday 30 December 2013

Prepping is fun too...

I realised today that, one of the reasons I haven't been blogging much lately is that I spend a long time waiting for stuffs to dry!!!! so from now I will post WIP as well as finishing posts(if I remember lol)
While prepping for the Soul Food classes, I was left with lots of strips of watercolour paper that seemed a waste to throw away...
 so I painted them all...
 in sympathetic colours, with the intention of weaving them together to make a funky sub strata to paint on...
 but then I decided to stick them onto a long canvas instead.
 I let pieces overlap the sides randomly...
 and turned a section the other way...just cos I could.
 Now this is just building up layers to work on at a later date, so dribbling paint felt like a good idea too.
 I know it seems a bit messy now(I like to call it "organic"), but who knows what it will inspire?
 Enjoy :D XXX
Photobucket

Friday 27 December 2013

Wow! I suck at blogging lately!

So before the hols I won a place on the new Soul Food art course, due to start December 30th. On the community page some of the teachers have left "pre-class" vids as appetisers...which I nommed my way through quite quickly. 
One of the vids was by Nolwenn Pettibois, and it inspired me to decorate the cover of the ringbinder I will store my classwork pieces in....(to keep the paintings separate, rather than as a journal)
I love "crafting", but I have so missed just getting messy with paint...I is back!

This is the reclaimed binder (I reclaimed from hubby)
I took a piece of paper I use to wipe excess paint on to and cut it to fit, before sticking in place with matt medium.
Next a layer of white gesso to add more texture...
before grabbing a selection of colours....
and randomly blocking out the page.
 I thought I'd try a more geometrical approach to my background.
Nolwenn had left some white spaces on her sample(but I got carried away), so I added smudges of white over the strong base...
as well as a few stencilled stars ....
 and doodles....
AND a little black for definition.
 Next it was time to place my figure. I loved the simplicity of the figure Nolwenn had painted, it added to the "holiness" and "spirituality" evoked by the piece.
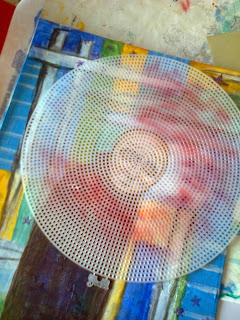
 To add his corona I pushed paint through a draining mesh...
 I used a bit too much paint, but then it just added nummy texture to the finished piece.
I used the same gold paint to add highlights to his face and surplus...
and a circle of white dashes to better define his corona.
I love my finished piece...something totally different for me.
I am sooooooo looking forward to starting this class...and sharing more art with you all.
Midnight Mass
(inspired by Nolwenn Pettibois' Bucket of Dreams)
Catch up with you all soon 
Enjoy :D XXX
Photobucket

Tuesday 10 December 2013

Feeling ill SUCKS!

Can't believe after all my good intentions last week...I got ANOTHER stinking cold that stopped me doing just about everything that didn't involve just going through the motions!
Then the wind hit....and totalled my greenhouse!!!

...but hubby is a star....and rebuilt/repaired it on Saturday...yay!

I did manage to get a few more cards posted off, and received a beautifully heart-warming letter from an overseas-online friend...
(did I mention while trying to rescue my greenhouse I dropped my phone in a water bucket and it wouldn't talk to my puter anymore? Hubby to the rescue AGAIN, swapped me for his :D)

So yesterday I baked buns...and today...

I AM going to ART!!!!
Enjoy :D XXX

Photobucket

Wednesday 4 December 2013

Finishing off....

Couldn't remember if I'd shared these knitted projects so here you go :D

a chunky sparkly scarf and black cabled wrist warmers...
a pair of red cabled wrist warmers...
AND (just finished) a girly pink set, comprising of an asymmetric shawl/hat/2 pairs of coordinating wrist warmers(so teeny!!!) 
Hopefully my niece will wear these as she refuses to wear gloves :D

Now back to finishing of the photo box, AND sort mum's photo's into scrapbooks....

Enjoy :D XXX
Photobucket

Tuesday 3 December 2013

Picture box project...so far...

I don't normally publish unfinished projects, but I am trying to get back into blogging :D

My MIL asked for a painting by me for Xmas.... I was flattered.....hubby was sheepish.
She would like me to paint a portrait of one of her grandchildren.....I was thrilled(proud)...hubby was silent...
oh!  Not one of my children?.....I said no!
But in the spirit of a loving wife, I told hubby I would make a special frame for the photo she wanted me to work from.
I am even using my precious(stroking) Anna Griffin 12x12 no longer available scrapbook papers...
and this is where I am up to right now...

The finished piece will be in a 12 x 12 deep box frame. These are wonderful for making and displaying special scrapbook pages as gifts.
 *see all my lovely Anna Griffin stuffs*
I chose 2 papers for the background, fancy cutting one to make a frame for the other...
 it's easiest to cut a large section out first...
 before trimming down and laying over second piece.
 Next I took a photo mount to use as a frame within the frame...
but it looked a bit boring...
 so I rummaged through my Anna Griffin stamp collection...
 over-stamped with pigment ink...
 added a little shading with a pale promarker, and a bit of "weight" to the corners with a gold gel pen.
I still have to build up the page with decoupaged roses and stuff, but I think MIL will be pleased with it when finished.

And for those who feel I'm being a little mean not doing the painting she wanted....she's never even asked for a photo of my boys...who are also her grandchildren.
Enjoy :D XXX

Photobucket

Sunday 1 December 2013

This is just getting ridiculous!

I have been horrendously bad at blogging recently, so I thought I better do some papercrafting to get back on board...after all....tis nearly the season!!!


I have a huge collection of stamps, and haven't played with them for ages, so I dug out this selection from Papermania (Urban stamps)....
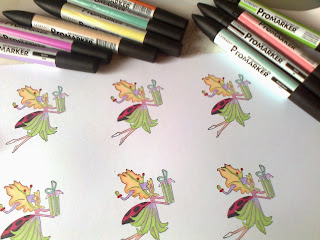
I chose and stamped one of the images, and coloured with promarkers.
If you buy stamps with coloured images on the reverse you can use them as a colouring guide, which makes the experience less daunting.
Next i decided to cut them out, leaving a thin white outline for easy cutting.
Now to select backing papers ....I has a huge stash....and found these awesome "Blonde Moments" papers that had a similar artistic feel as the stamp set...
Leaving a white border helps the stamped image stand out from the papers, but you can soften the edge by choosing a marker in a light tone that is sympathetic to the background. 
Now for a sentiment...and I have lots of those too...especially Anna Griffin ones...
Using just 2 papers, I ripped strips to make a collagey background then edged with red marker...
The fairy is raised on teeny tiny foam pads.
 So now I decided to decorate the envelopes.
I chose another small stamp from the same collection, masked off the centre of the envelope and stamped a border. I decided to leave these just as outlines, but then stamped another as a seal on the flap and coloured it in.
I really enjoyed making these, had forgotten how much fun stamping and colouring could be.
And now I have several more paper projects to do "for the season", so hopefully will have more to blog(plus finishing up a knitting project to share)
I would like to enter these cards for the following challenges...
Paper Saturdays - decorating envelopes
Crafting When we Can - Winter (spirit of the season)
Artistic Stamper - Anything Goes (must include stamping)

Enjoy :D XXX
Photobucket